Sign up to get the latest on sales, new releases and more …
Mike talks about...
SAVING A SOLID OAK MERSMAN COFFEE TABLE FROM THE 1980's
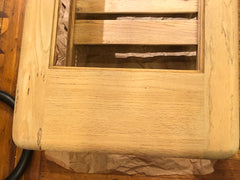
Running an errand in Cobble Hill Brooklyn one night with my daughter, I came upon this 1980’s oak coffee table on the curb. People had given up on it, but they were decent enough to put all the missing slats out with it. I left it there sort of hoping someone else would take it on, but walking back to the car, there it was. I had to take it. (You can see how much my daughter appreciated this extra detour)
Why did you have to take it?
If someone took the plans for this table to a shop today to have it custom made, it would easily be $1500 or more for the wood and machining. I simply couldn’t let it go to the landfill.
What do you know about the table?
Despite the solid wood, this table was early “knock down furniture” by Mersman, an American mass-producer of mainly living room tables that closed down in 1995, after over 100 years. It would have shipped in a flat box, to be assembled by the consumer (or more likely, employees at the furniture store).
Today’s equivalent coffee table would be made of pressed board, not 5/4 solid oak, so you wouldn’t even think of restoring it in 40 years—but the solid wood and good design here merited a professional approach to restoring it.
What was your process?
My first step was to carefully knock the rest of the slats out with the intent of properly reconstructing the whole table. Interestingly, the slats were originally held in with a higher quality mortise and tenon joint, but then somewhat crudely nailed because gluing them would have required serious clamping which would have been beyond the expertise and resources of most assemblers. This made the table less structurally sound -- so I knew that when I was done, it would be even better than it was new.
I pulled the nails out and cleaned all the joints out of crud. Fyi, glue doesn’t adhere well to crud. There was some very minor collateral damage from removing the nails, which I filled and sanded.
I applied a stripper to remove as much of the old finish of the table as possible. (I am not brand loyal in my wood strippers, I find they all basically work fine for my purposes.)
After the stripper, I used a stripper wash with steel wool to remove all chemical residue. This is an important step in the process and skipping this step will almost always compromise the newly applied finish. Sometimes right away, sometimes in a few months or even longer. The bottom line is that it can be a real mind-fu*k so just do the work and clean it right.
Let’s talk about sanding.
Hand sanding was next. Sanding the slats and rails was much easier because they were apart, allowing me to sand evenly right off the edge. Whenever you have the chance to take a piece of furniture apart to work on it, you should.
You’ll notice in my photos that the round legs actually have machine sanding marks from the factory, which they covered when they put the tinted topcoat finishing on the wood. These days we appreciate a natural wood aesthetic, so I knew I wouldn’t be applying an opaque finish; I needed to hand sand these marks away for a high-quality restoration. (see photos)
Speaking of the right way to do things, many people don’t take the time to truly sand away all the old finish, particularly at joints and other tight spots. If you are a purist (I am) you may think you can never go across the grain (which makes cleaning old finish at the joints nearly impossible.) So related to this matter please indulge me in this minor tangent…
I’d like to pay homage here to an old timer here in Bed-Stuy Brooklyn, a man named Dorsey, who passed away a few years ago, but who taught me this trick (among many other life lessons he imparted to me). Fifteen years ago I was new to the neighborhood and just starting out in my business (and my life as a husband and father -- you get the idea). A very affable man who was the super at the church on the block, he walked by our house at the same time every day like clockwork, always stopping to watch and chat if I was working outside. I’ll never forget the day I was kind of struggling with the tedium of sanding one the aforementioned type joints when he leaned over the fence, with a stogie in his mouth and the gravelly voice expected to accompany such, and asserted “Just get in there and clean it up, get a little circular in your motion, then go back and take them lines out!” In other words the old master gave me permission to ‘break the rules’ just enough to get the job done. And he was so right – once in a while we have to break the rules and that’s that. (Just don’t turn into Trump.) Anyway, Dorsey had some great stories about his life including the half season he spent on the Brooklyn Dodgers when Jackie Robinson was there. He only played a couple innings in one game but of course he proudly relayed his experience and I was proud to know him. I don’t mean for this sound in any way funny or ironic because it’s true: I cried when he died.
Re-assembly (and some chat about gluing)
Now it was time to reassemble the piece in the professional and serious way that the solid oak and cool design deserved. I got out my stash of clamps and commenced with planning, because when you have this many joints (16) that must be glued at the same time, you need to work skillfully and efficiently. I also recommend using slow-set glue in such situations to allow enough time to get every joint completely coated and then cleaned up after the clamping.
I needed to glue all at once to ensure the table ultimately fit back together properly and square, which is a lot more trouble than gluing in stages. Plan ahead so you can work quickly! Once you have your plan, get glue in all the joints, then get it all put back together, and make sure your clamping pressure is even all the way around to avoid twists and turns that you don’t want. Check it with a square if necessary, to make sure everything is lined up well.
The most tedious part of gluing is not the planning, its making sure you get all the squeeze-out glue wiped up. I use recycled paper towels and lots of water. It’s a mess, and it’s supposed to be a mess, so do it on a drop cloth!
Then I let it dry for 24 hours. Wood glue technically dries in an hour, but I never unclamp things that early, because why rush it?
I’m pleased to say that this table is now much stronger than it was originally, thanks to the magic of wood glue and proper clamping.
Once the clamps come off, you have to go around and sand everything again, because making it wet while wiping up the glue raises the grain. So go back over it lightly with 180 or 220 grit to do a final sanding and clean with mineral spirits, which does not raise the grain.
Finally, it was time to refinish. I chose a tung oil for the legs and slats, to protect (but not hide) the wood, and a clear lacquer on the top for a harder more resilient finish for the everyday use that a table top is subjected to.
I applied the lacquer with a high-quality bristle brush. I gave it a light sanding between coats only for de-burring purposes, with a 600 grit paper. Four coats of lacquer on the top, as well as 4 coats of tung oil finish. (I find that Tomahawk is a better brand of tung oil.)
The finishing touch after the re-finishing
I purchased the glass cut at a local glass shop, where they took my measurements and had the glass for me a couple of days later. I chose smoked because it is light enough to see through allowing the structural design to be appreciated, and it is dark enough to create contrast and definition in the piece.
January 16, 2023
I have that table as well as two side tables that go with coffee table. One has book/magazine compartment and other is just smaller. Still in excellent condition. Bought in 1981 brand new. Contemplating selling them.
Comments will be approved before showing up.
Mike talks about...
SAVING THE SHATTERED BUST OF A MID-CENTURY JFK BUST
Mike talks about...
RESTORING A PAUL MCCOBB PLANNER GROUP DROP LEAF DINING TABLE
Sign up to get the latest on sales, new releases and more…
Bobby
January 16, 2023
What would this table be worth?